
I schedule an annual instrument proficiency check before the Pacific Northwest skies turn gray as fall arrives. The tasks that you must accomplish to complete an IPC are outlined in the practical test standards for the instrument rating and in an appendix to Instrument Proficiency Check (IPC) Guidance, published by FAA.
Instrument Proficiency Check. 14 CFR part 61, section 61.57(d), sets forth the requirements for an instrument proficiency check. The person giving that check shall use the standards and procedures contained in this PTS when administering the check. A representative number of Tasks, as determined by the examiner/instructor, must be selected to assure the competence of the applicant to operate in the IFR environment. As a minimum, the applicant must demonstrate the ability to perform the Tasks as listed in the [chart below]. The person giving the check should develop a scenario that incorporates as many required tasks as practical to assess the pilot’s ADM and risk management skills during the IPC. See Appendix 2 for IPC AATD Credit Table. (FAA-S-8081-4E with Changes 1, 2, 3, 4, & 5)

As you can see, the required items include VII–Emergency Operations, Task D: Approach with Loss of Primary Flight Instrument Indicators. The notes for that task in the PTS specify that the pilot, “Demonstrat[e] a non-precision instrument approach without the use of the primary flight instrument using the objectives of the non-precision approach Task (Area of Operation VI, Task A).”
In an airplane with conventional instruments (the so-called steam gauges), the instructor covers the attitude indicator with a suction cup, business card, or sticky note.
Like many pilots, however, I’ve updated my instrument panel. It now features a Garmin G500 electronic display that replaces six traditional primary flight instruments (airspeed indicator, attitude indicator, altimeter, vertical speed indicator, heading indicator, and turn coordinator). I have a backup attitude indicator, ASI and altimeter in the self-contained Mid-Continent SAM.

Now, avionics manufacturers and the FAA have advised against pulling circuit breakers to simulate failures of electronic displays and the behind-the-scenes gizmos that drive them (e.g., attitude-heading reference systems). Plastering expensive displays—especially touch-screens–with sticky notes isn’t a good idea. So, how to simulate the failure of the PFD (the left side of the G500)—or, indeed the entire GDU 620, the two-panel display that shows the flight instruments and a map?
For more information about using CBs to simulate failures, see Garmin’s G1000 Guide for Designated Pilot Examiners and Certified Flight Instructors. That document notes in part:
Cessna does not recommend pulling circuit breakers as a means of simulating failures on the Garmin G1000. Pulling circuit breakers—or using them as switches—has the potential to weaken the circuit breaker to a point at which it may not perform its intended function. Using circuit breakers as switches is also discouraged in Advisory Circulars 120-80, 23-17B, and 43.13-1B. Additionally, a circuit breaker may be powering other equipment (such as avionics cooling fans) that could affect the safe operation of other equipment.
For the map side, it’s easy—select a page that shows, say, A/FD information or one of the AUX pages. They’re useless as references during an approach.
After much deep thought, I came up with the following solution for the PFD side: A piece of cardboard taped above the display. Here’s the item lying in wait in the holder that I use for my iPad.

And here it is in place, covering most of the PFD.

Inelegant to be sure. I’ll trim it to size next time. But it’s simple, non-destructive, cheap, and easy to put in place and remove. In a aircraft used primarily for training, I’d consider a strip of Velcro above the PFD.
If you wanted to “fail” just the attitude indicator and leave the ASI, altimeter, VSI, HI, CDI, bearing pointers, and other information visible, you could trim the cardboard so that it covers only the AI portion of the PFD.
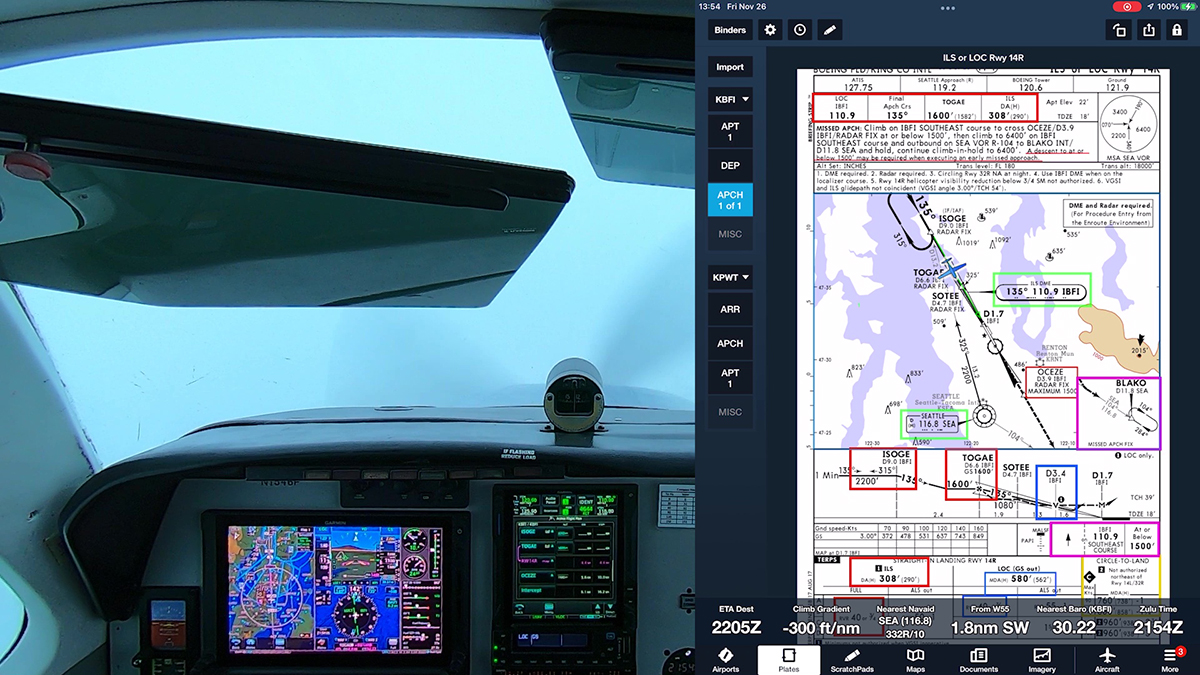
Today, however, I wanted to simulate a complete failure of the GDU 620 to see how well I could fly an approach using the SAM and the navigation information on the GTN750 and the chart on my iPad. Per the PTS, I was flying a non-precision approach, so I didn’t need a glideslope indicator.
To set up descents on each segment of the approach, I applied the Pitch+Power+Configuration=Performance equation, knowing that at a specified power setting and pitch in a given configuration (flaps and landing gear positions), I would descend at approximately 600 fpm at a stable airspeed. Tracking the courses was a bit more difficult than when using the HSI, but this was a simulated emergency, so I used all available sources, including the depiction of my airplane on the GTN750 moving map and the approach chart displayed (via ForeFlight) on my iPad. By making small, coordinated turns based on the SAM, I never wandered more than about a dot off the centerline of any segment of the approach. The graphical information made meeting altitude restrictions easier. And the trend vectors that show how your current track relates to the required course were also a big help in making smooth, small heading changes.
I plan to use this high-tech failure simulator in the future when I practice flying instrument procedures (in VMC, of course) to maintain my proficiency. Note that this device would also work well in ATDs and FTDs that feature glass cockpits.
 …In older NTSB cases, both the FAA and the airman have used sections of the AIM to assess whether an airman’s conduct was in violation of the FAR or not. For example, an airman attempted to justify a right turn during his approach to the airport as part of a “straight-in” approach as set forth in the AIM. But the case did not rely on the new statutory language of deference.